¶ Introduction
The Closing In & Out Entry UI is designed to create closings for inbound and outbound transactions. This functionality ensures that all service charges for receiving and shipping items in the warehouse are accurately calculated and documented to make invoices.
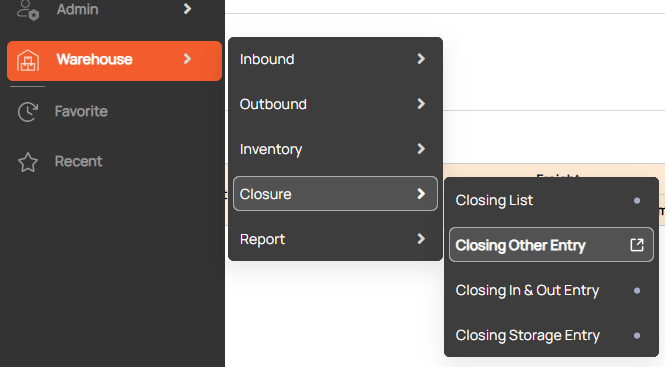
Navigation: Warehouse > Closure > Closing In & Out Entry
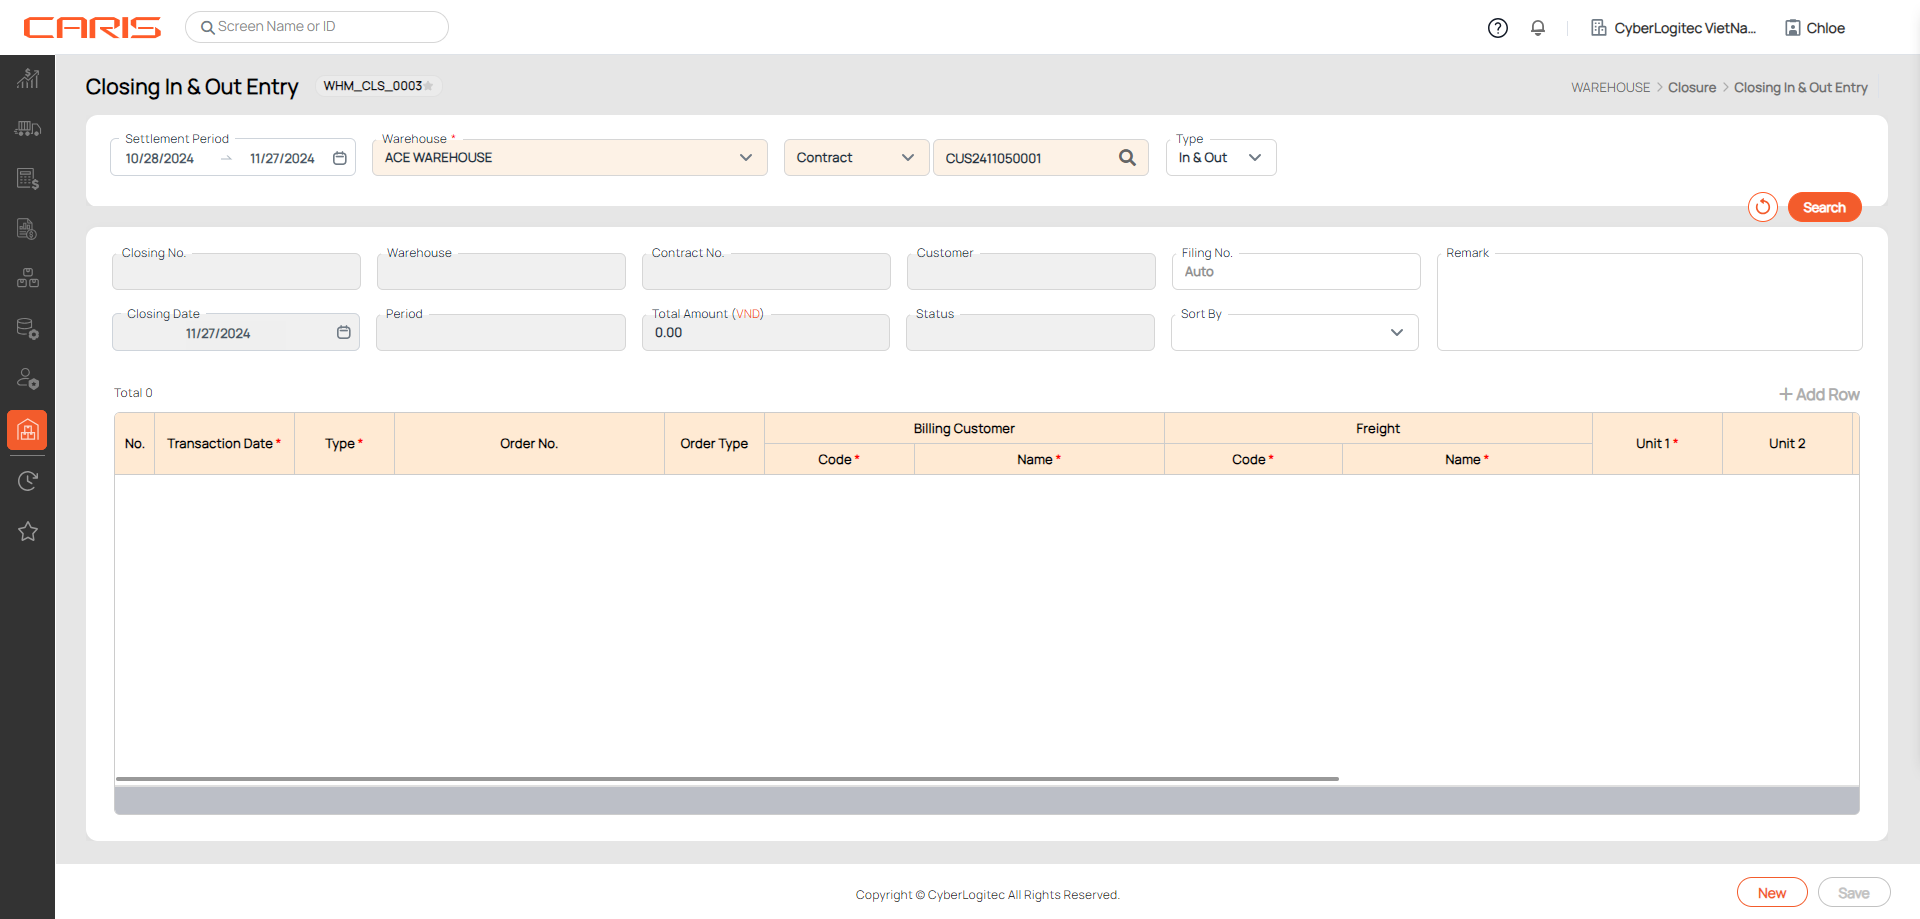
Screenshot
Workflow in Closing UI:
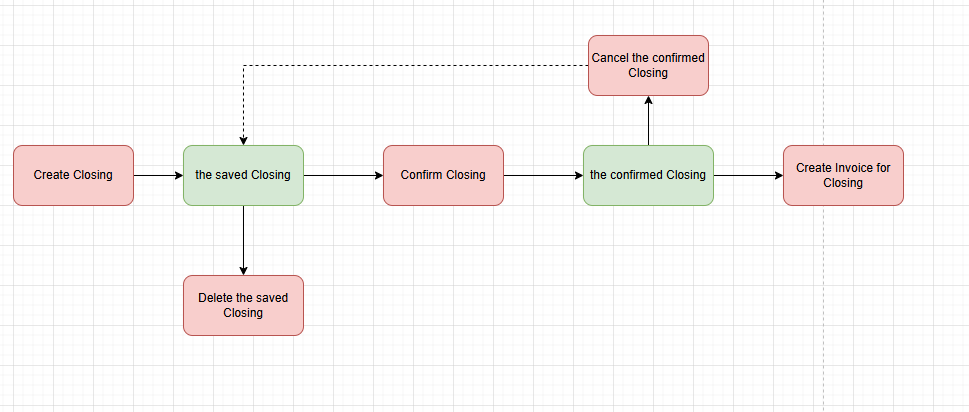
¶ Create a Closing In &Out
Steps to create:
1. Open the Closing In&Out Entry screen
2. Fill in the necessary details to define the scope of the closing:
- Warehouse: Select the relevant warehouse for the closing.
- Settlement Period: Specify the time range for the closing (start and end dates).
3. Choose Search Option
- Contract: Select this option if you want to search by contract. Enter the Contract No. to filter the freight based on the specified contract.
- Customer: Choose this option if you want to search by customer. Enter the Customer Information to filter the freight by customer.
4. Select Transaction Type: Specify the type of transactions you want to include in the closing
- In & Out: Includes both inbound and outbound freight charges.
- Inbound: Includes only inbound-related freight charges.
- Outbound: Includes only outbound-related freight charges.
5. Click the Search button
After entering the necessary information, click the Search button. The system will display all relevant freight charges based on the selected filters (warehouse, settlement period, contract/customer, and transaction type).
Search logic with the Settlement Period, the system determines the relevant transactions to include in the closing based on the transaction dates.
- For Booked Status: If the booking status is Booked, the system will map the period based on the Estimated Date of the booking.
- For Received or Shipped Status: If the booking has been Received or Shipped, the system will use the Inbound Date (for received items) or the Outbound Date (for shipped items) to determine if the transaction falls within the specified settlement period.
This functionality ensures that only transactions that fall within the selected timeframe are included in the closing calculation.
Once the data is loaded, you can update some freight information if needed.
6. Click the save button
After reviewing the search results, click Save to store the closing.
After saving successfully:
- The status will be updated to “Saved” and Closing No. auto-generate.
- The Delete button and the Confirm button will be displayed on the screen.
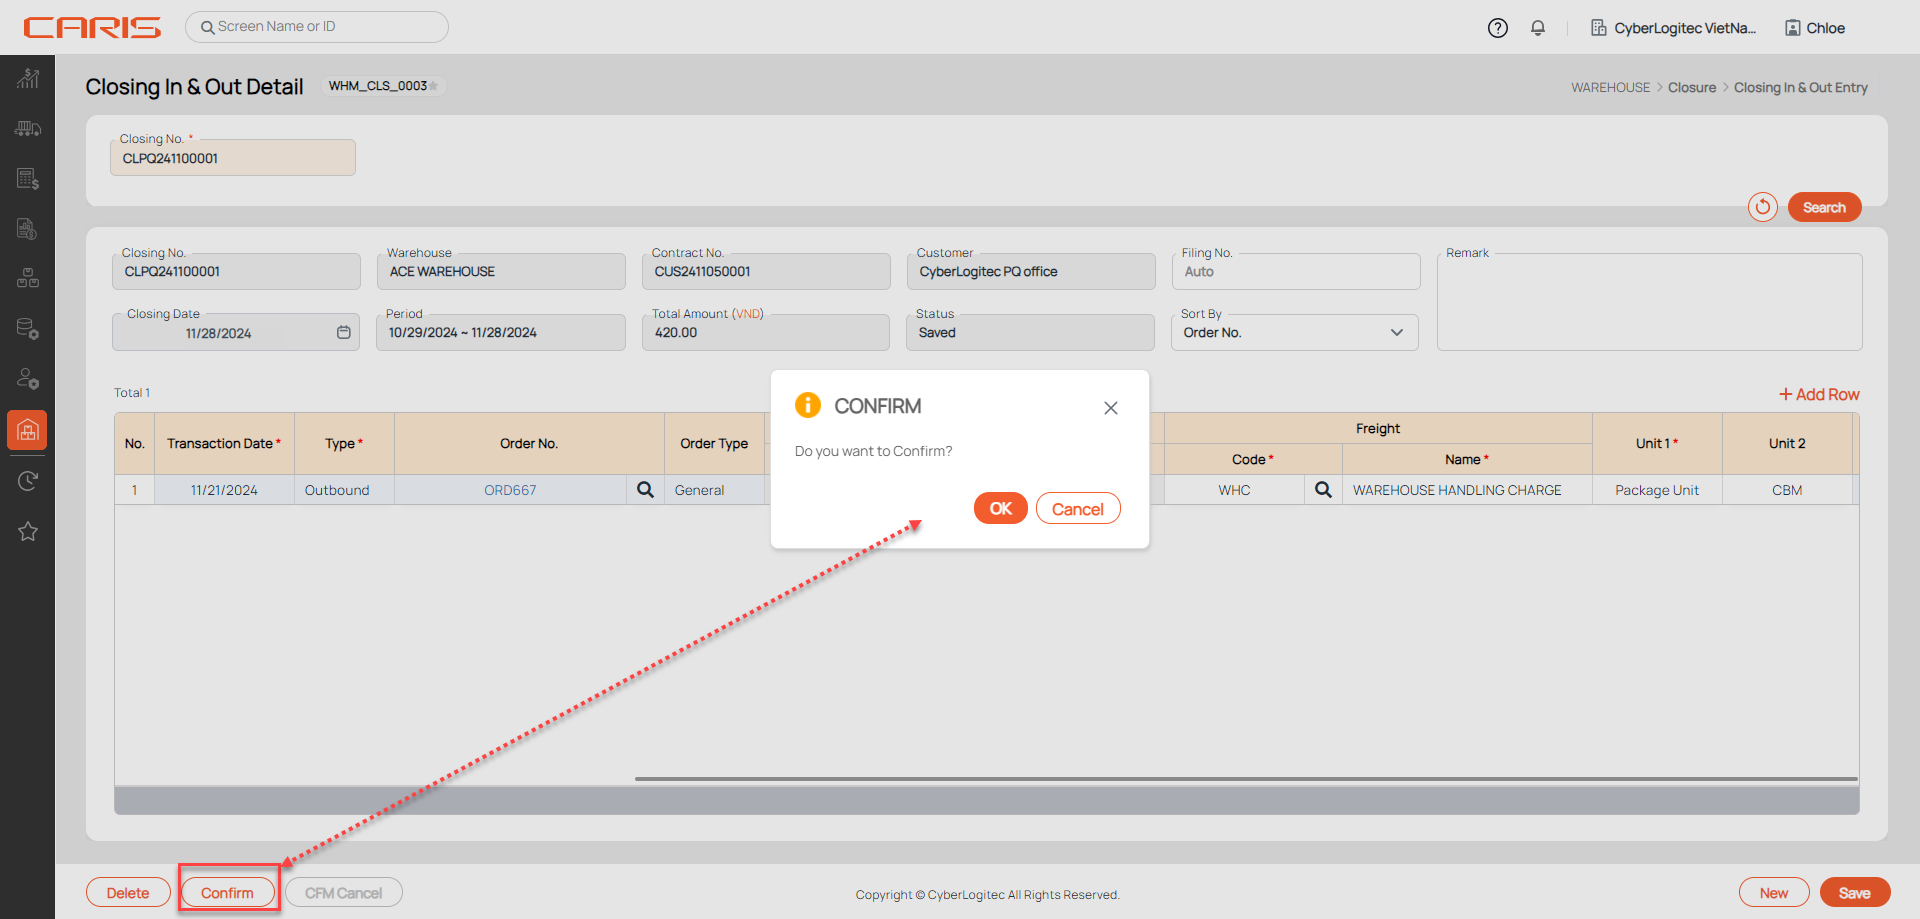
¶ Confirm a Closing
- Confirming a Closing is mandatory before generating an invoice.
- Once confirmed, the data in the closing cannot be modified. However, users can cancel the confirmation by clicking the CFM Cancel button if necessary. After canceling the confirmation, the record can be edited and re-confirmed as required.
- Use the Closing List to track and manage all confirmed closings and generate invoices as needed.
Steps:
- Open the Closing In&Out has Saved status
- Click the Confirm button
- Users can manually input the filling number. If no input is provided, the field will display "Auto", indicating that the system will automatically generate the filling number upon clicking Confirm Closing.
- After confirming successfully: can't edit Closing information, the status will be updated to Confirmed and the CFM Cancel button will be shown on the screen.
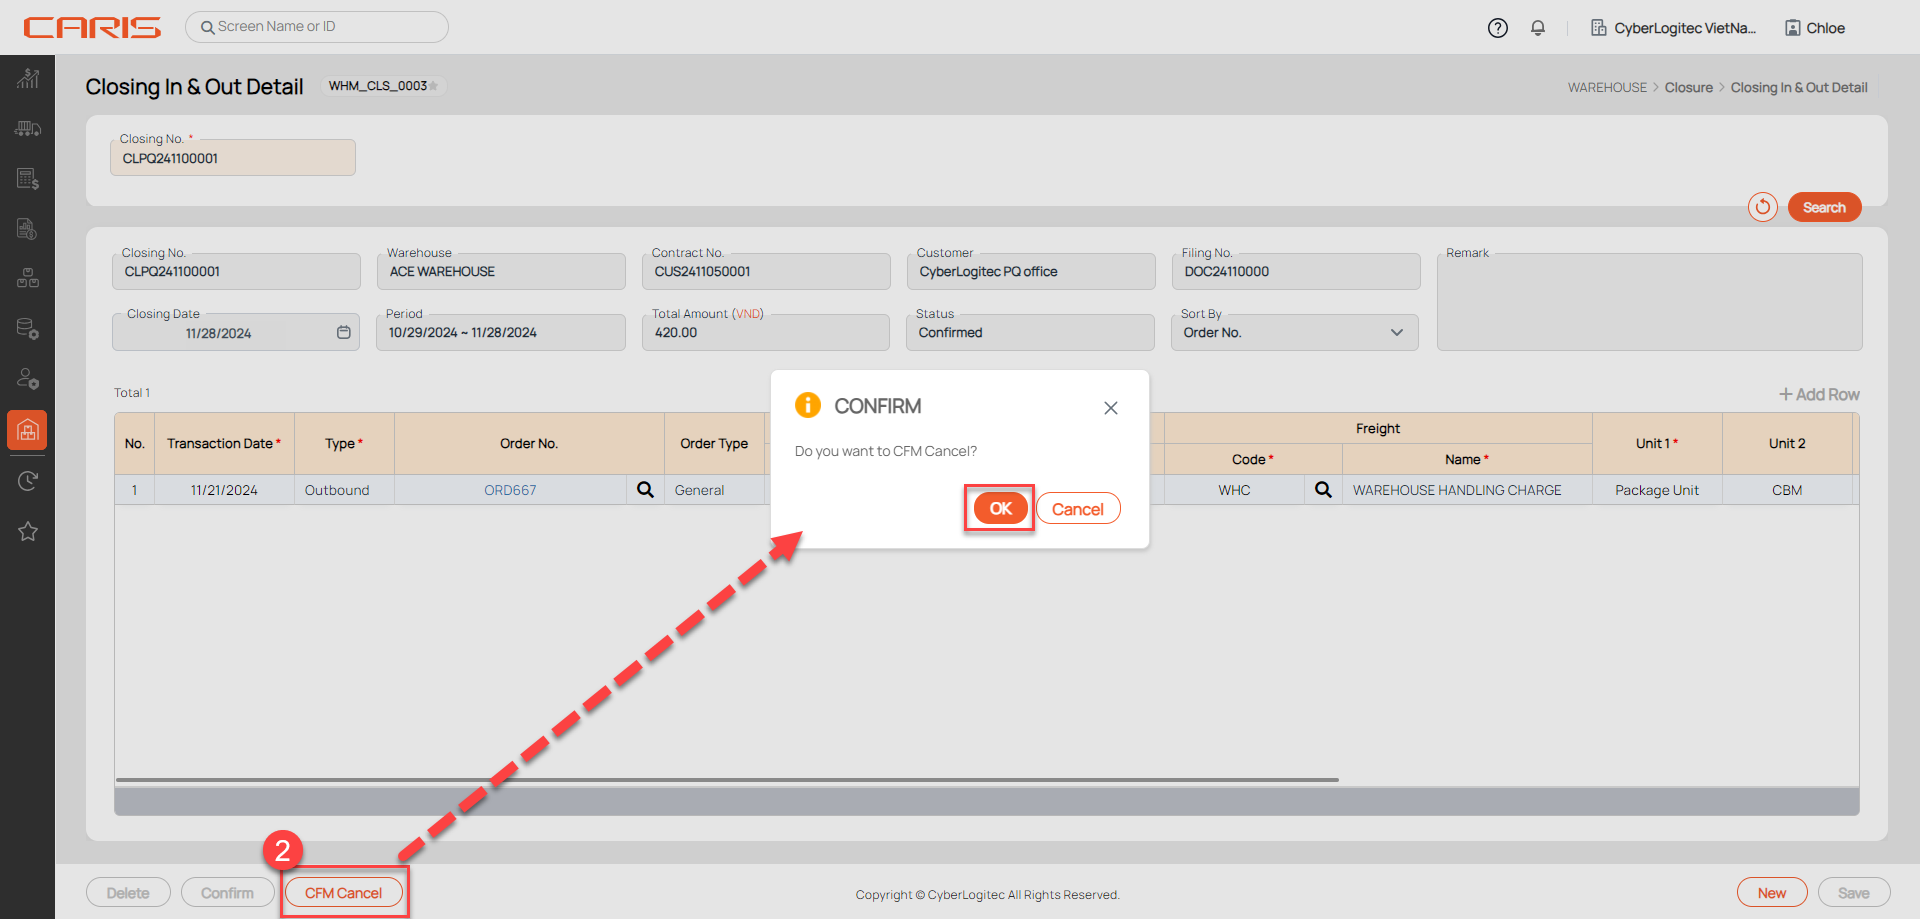
¶ Cancel the Confirmed Closing
Once a closing record has been confirmed, it becomes locked and cannot be edited. However, if changes are necessary, users can cancel the confirmation using the following steps:
- Open the Closing Other has Confirmed status
- Click the CFM Cancel button
- After canceling successfully, the status will be updated to Saved, the save and delete buttons will be shown and the cancel button will be hidden.
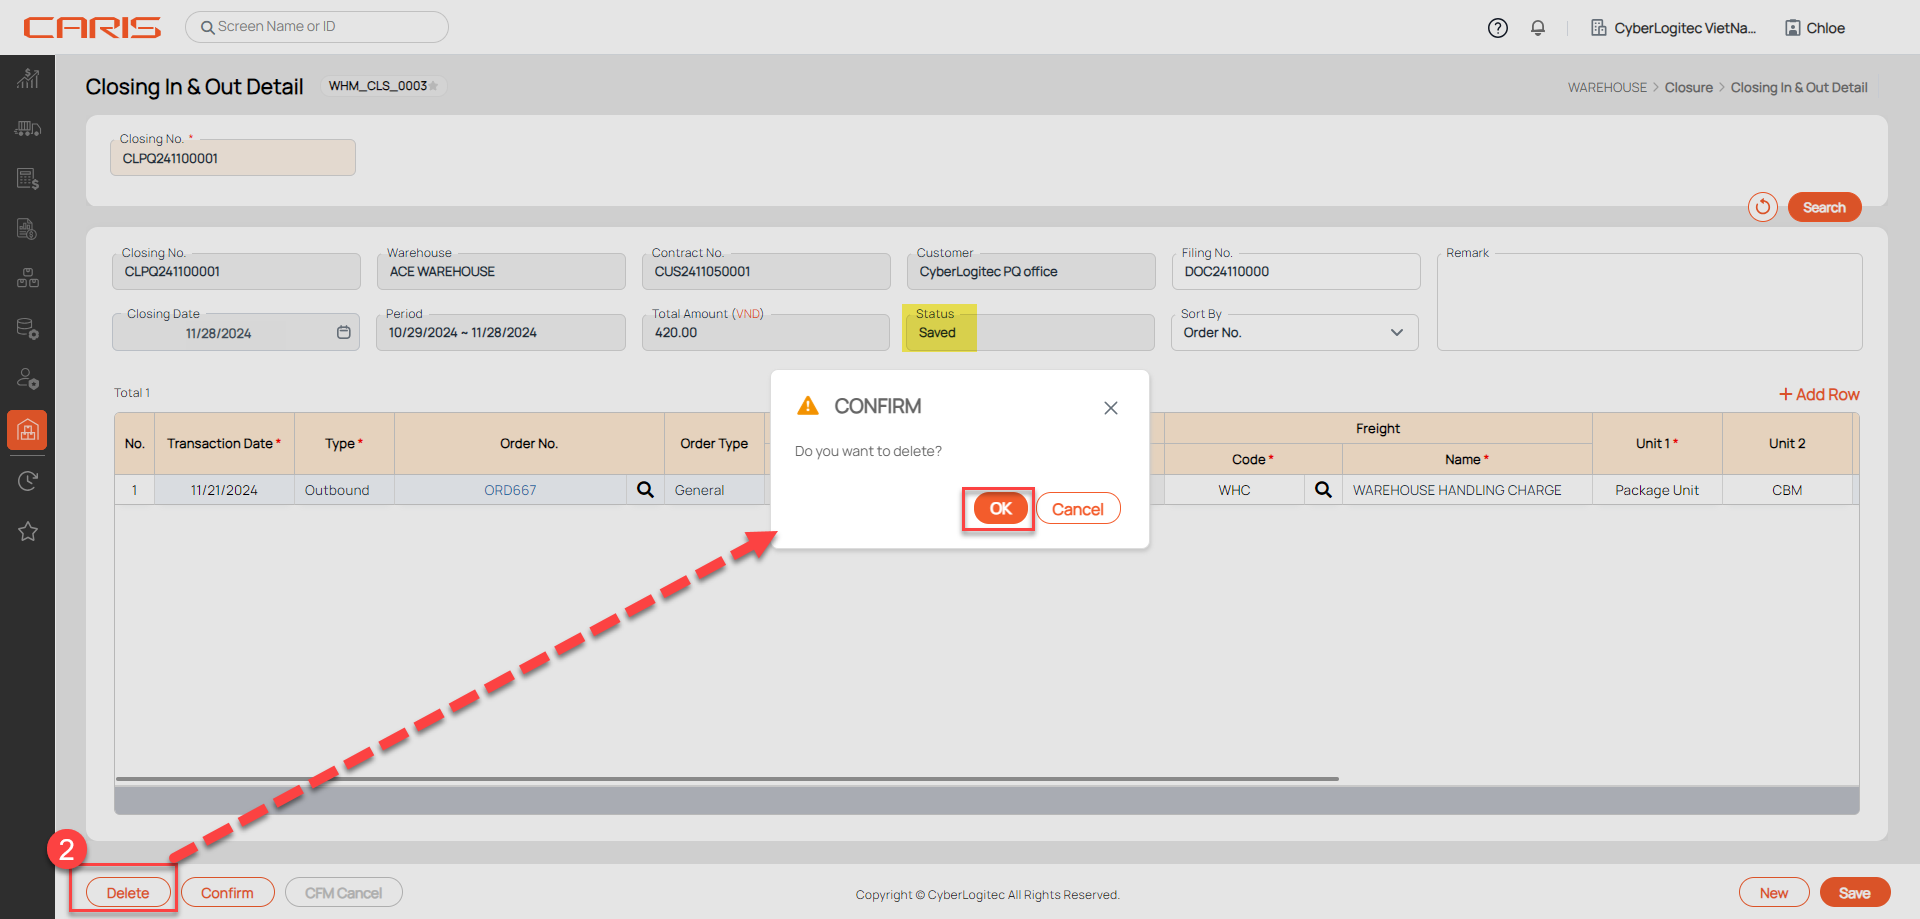
¶ Delete a Closing
After deleting successfully, can't retrieve this Closing in the system. Please check carefully before deleting.
Steps:
- Open the Closing Other has Saved status
- Click the Delete button